This article is the operator's manual for the Polaris 2 Gen4 motorhome - Australia Self Contained (JUCY / Star RV). It covers keys, fire extinguisher and smoke alarm, starting the vehicle, baby seat installation, windows and vents, fans, the 240-volt and 12-volt electrical systems, microwave, fresh water, grey water, water pump, hot water heater, toilet use and cassette, shower, external shower, gas bottle, stove top, tap and sink, heater and air conditioner, fridge, lights, television, dining table, external table, swivel chairs, power points, bed, entrance step, storage, internal blinds, awning, diesel fuel, AdBlue, changing a tyre, safety and operational features, and dashboard warning lights.
Need-to-know
- Fuel type: Diesel only. The fuel cap is marked "DIESEL" and is unlocked using the vehicle diesel key. If filled with unleaded, water, or AdBlue - do not start the engine. Call STAR RV Roadside Assistance immediately.
- AdBlue: Required every 2,500 km. AdBlue filler cap is below the diesel filler cap. Failure to refill causes limp mode. Do NOT add AdBlue to the diesel tank.
- 240-volt: Required for microwave, power points, and air conditioner. Two circuit breakers on the outside of the vehicle next to the power outlet. Plug in every second night. 240-volt plug is on the driver's side. GPO (General Purpose Outlet) on passenger side 240-volt mains only.
- 12-volt panel: Located above the front dinette table on the wall. Touch the screen to activate. Green indicator light appears on right-hand side of each button when on.
- Water pump: Press the Pump symbol once on the switchboard. Must be on for tap, shower, and toilet flush. Turn off when not in use. Do not run empty.
- Hot water: Gas-operated. Switch above the dinette table. Gas bottle under the bed. Hot water heats as you run the tap - takes a couple of minutes.
- Stove: Rangehood must be on for the stove to work.
- Air conditioner: 240-volt only. A/C switch in cupboard above TV must be flipped on before using remote. Always turn off via remote before unplugging from mains.
- Fridge: 12-volt and 240-volt. Press power button to turn on/off. Night mode available.
- Gas bottle: Under the bed at the back. Never drive with gas bottle open.
- Toilet cassette: Must be emptied and cleaned before returning to the depot.
- Smoke alarm: Powered by a replaceable 9V battery. Do not disconnect.
- Step: Retracts automatically when vehicle is shifted into drive.
- Emergency contact: STAR RV Roadside Assistance - call for wrong fuel, overheating, or any red dash light.
- Red dash light rule: Red = stop safely and call Roadside Assistance. Amber = drive cautiously and report.
1. Description of keys
Ignition key: Start the vehicle and lock/unlock the diesel tank cap (remove the key from the shell to use on the fuel cap).
Fresh water key: Lock/unlock the freshwater compartment.
Compartment key 1: Lock/unlock the LP gas storage compartment.
Compartment key 2: Lock/unlock the toilet cassette compartment.
External shower key: Lock/unlock the external shower compartment.
2. Vehicle equipment
Fire extinguisher
Each vehicle is equipped with a dry chemical fire extinguisher, selected to address both Type B fires (grease and liquids) and Type C fires (electrical). The fire extinguisher is attached to the interior of the vehicle.
To deploy the extinguisher:
- Grasp the ring at the top of the bottle.
- Direct the nozzle towards the top of the flames.
- Press the lever down firmly.
- Guide the nozzle from side to side across the base of the flames.
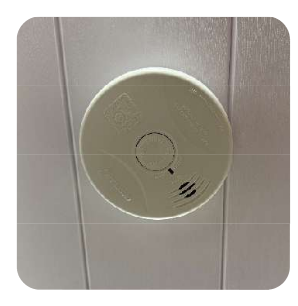 Smoke alarm
Each vehicle is furnished with a smoke alarm powered by a replaceable 9-volt battery. If a replacement is needed during your rental, purchase a new battery, retain the receipt, and reimbursement will be arranged upon vehicle return.
Do not disconnect the smoke alarm. It must be connected at all times for your safety.
3. Starting the vehicle
The gear stick must be in PARK and your foot on the brake pedal in order for the vehicle to start.
Gear stick in parking mode
- The dashboard will display a 'P' indicating that the vehicle is in park.
- Start the vehicle using the ignition key.
- With your foot still on the brake pedal, pull the gear stick down into the 'D' position. The dashboard will display a 'D' indicating drive.
Gear stick in driving mode
Handbrake: Located on the right-hand side of the steering wheel.
- To disengage: Click the handbrake down once. A white light will disappear from the dashboard.
- To engage: Pull the handbrake button towards you. A white light will appear.
Note: Do not forget to disengage the handbrake before you drive.
4. Baby seat installation
The two anchor points for baby seats are located on the front forward-facing seat at the dinette behind the driver's cabin. The anchor points are on the floor behind the seats.
To install the baby seat:
- Feed the tether strap through the back of the chair.
- Reach down to click the anchor into the anchor point.
- Thread the vehicle seatbelt through the seatbelt path on the baby seat from one end and buckle on the other side.
- Ensure the seatbelt is firmly secured.
5. Windows and vents
Windows: Turn the handles inwards. Push the window out and click the latch in place. The window has a mosquito net and a sun blackout blind. These can be used separately.
- To use the mosquito net: Pull the white blind down using the handle indents. Clip into place.
- To use the sun blackout blind: Pull the blind up using the handle indents. Clip into place.
Vents: Push the button on the vent, grab the rail, and pull it towards yourself to open.
The vent has a mosquito net and a sun blackout blind.
- To use the mosquito net: Pull the blind to the left using the handle indents.
- To use the sun blackout blind: Pull the blind to the right using the handle indents.
6. Fans
The vehicle is equipped with a small fan above the double bed, operated via 12-volt power.
- Power button (1): On/Off.
- Settings button (2): Sets fan speed.
7. 240-volt electrical system
To run the microwave, power points, air conditioner, and to recharge the house battery, connect the vehicle's 15AMP electrical cord to a 240-volt external power source. These items will only work when plugged into power. It is recommended that the vehicle is plugged into power every second night to keep the house battery charged. The 240-volt plug is located on the driver's side.
Circuit breakers: The 240-volt outlets and appliances are protected by two circuit breakers. If a power surge trips the circuit breakers, locate them on the outside of the vehicle next to the power outlet and switch back to the ON/UP position. Overloading the system can cause the circuit breakers to turn off.
The vehicle is also fitted with a GPO (General Purpose Outlet) designed for a 240-volt, 10-amp power cord, located on the passenger side. This will only function when the vehicle is connected to an external 240-volt mains supply.
8. 12-volt electrical system
The vehicle has two batteries - one in the engine compartment and one in the rear of the cabin (the domestic battery). The engine compartment battery is located under the passenger's side cabin floor in the front cabin.
The domestic battery operates the water pump, fridge, and interior lights. It is charged by the alternator when the vehicle is being driven and by the 240-volt system when plugged into mains power.
The 12-volt electrical control panel is mounted above the front dinette table on the wall. To activate, touch the screen. A green indicator light will appear on the right-hand side of each button to show which systems are switched on.
Panel functions:
- PWR - turn power on and off.
- Pump - turn water pump on and off.
- Night - turn the screen off at nighttime.
- HWS - turn the hot water system on and off.
- Light1 / Light2 / Light3 - turn the lights on and off.
- 12-volt battery charge percentage.
- Tank 1 - fresh water tank.
- Tank 2 - grey water tank.
9. Microwave
The microwave operates via 240-volt power only. The vehicle must be plugged into an external power source.
Control panel:
- Menu action screen: Shows cooking time, power, indicators, and clock.
- Power: Press repeatedly to set power level.
- Clock/Preset: Set clock or program auto-start cooking.
- Weight/Time Defrost: Enter weight/servings or set defrost time.
- Multi-stage cooking: Program multiple cooking stages.
- Stop/Cancel: Cancel/reset, pause (press once), stop (press twice), or set child lock.
- Time/Menu (knob): Turn to set time or select auto menu.
- Start/+30SEC: Start cooking or press repeatedly to add 30 seconds at full power.
Troubleshooting:
| Problem | Possible cause | Solution |
|---|---|---|
| Microwave is inoperable. | 240-volt power cord not plugged in. | Check that the vehicle is connected to mains power and that the outlet is in working order. |
| Microwave is inoperable - light on and turntable working but not heating. | Microwave broken. | Contact Star RV Roadside Assistance. |
| Sparks when microwave is turned on. | Metal object in microwave. | Remove object. |
10. Fresh water tank
The vehicle has an onboard freshwater system consisting of a water pump and freshwater tank. The water tank has an 80L capacity and is located on the passenger side of the vehicle. This water is for the sink, shower, and toilet flush.
To fill the freshwater tank:
- Unlock the compartment marked "Water only" using the small white key on your keyring.
- Remove the cap from the water inlet.
- Place the end of the water hose into the tank and connect the hose to the tap to fill with fresh water.
Important tips:
- Do not use too much pressure - the tank must be vented while filling.
- If you get an air bubble, remove the hose, reinsert it, and fill slowly again.
- The tank is full when water starts to overflow from the water inlet.
You can check the water level on the 12-volt switchboard - this is the 1st tank level on the control panel.
11. Grey water tank
The grey water holding tank collects wastewater from the kitchen, bathroom sink, and shower. You can check the level on the 12-volt switchboard - this is the 2nd tank level on the control panel. Note: the grey water level indicator may give an inaccurate reading and show 100% even when empty. Empty the grey water tank as regularly as possible.
To empty the grey water tank:
- Collect the grey water hose from the storage compartment.
- Connect the hose to the outlet. Make sure it is firmly attached by pulling down the silver levers on each side of the attachment.
- Place the other end of the hose into the dump station disposal opening.
- Open the tank by turning the blue lever so it is parallel with the pipe. Wait for it to empty.
- Once the grey water is empty, close the lever, remove the hose, and stow it away in the storage compartment.
If the grey water tank becomes obstructed:
- Insert a hose into the grey water outlet as far as it reaches.
- Turn on the hose to its highest pressure setting and direct the flow of water into the tank until it reaches full capacity.
- Withdraw the hose to facilitate the flow of grey water.
- Repeat if needed until the obstruction is cleared.
12. Water pump
To use water on board the vehicle, ensure there is water in your freshwater tank. On the switchboard, press the Pump symbol once. You will hear the pump quietly start up. The pump operates as part of the 12-volt system. When you are not using the water pump, ensure it is turned off.
The water pump must be on to operate the kitchen tap, shower, and toilet flush.
Note: Avoid running the pump when the water tank is empty. Operating the pump continuously with no water can cause damage.
13. Hot water heater
The switch to activate the gas-operated water heater system is located above the dinette table.
To operate the hot water heater:
- Turn the gas bottle, located in the rear doors under the bed, to the ON position. Twist the valve counterclockwise to open and clockwise to close. Note: The system will not function if there is insufficient gas in the bottle.
Activate the PWR, Pump, and HWS button on the 12-volt switchboard. This will also light up the screen on the hot water system control panel.
- When you run hot water, the "OFF" will disappear and a wheel will spin on the bottom left of the screen showing it is heating. The water will take a couple of minutes to heat up.
14. Toilet use
- Turn on the pump button on the 12-volt control panel.
- Push the blue button on the toilet to fill the base with water.
- Once finished, adjust the lever on the bottom of the toilet to empty into the cassette.
- Ensure the lever is in the closed position after use.
15. Toilet cassette
It is highly recommended to regularly empty the toilet cassette. It is mandatory to empty and clean it before returning the vehicle to the depot.
To empty the cassette:
- Lift the blue lever and remove the entire cassette from the vehicle.
- Rotate the pour-out spout and unscrew the cap.
- Dispose of waste at a designated black water dump point.
- Rinse the cassette thoroughly and repeat the emptying process.
- Add a toilet chemical along with half to one litre of water.
- Click the cassette back into position so it aligns with the toilet above.
If the cassette becomes jammed: Do not apply excessive force. Ensure the toilet cavity inside the vehicle is securely closed, then remove the cassette.
16. Shower
To operate the shower:
- Activate the gas-operated water heater system (as shown in Section 13).
- Turn on the water pump by pressing the PUMP button on the control panel.
- Pull the shower handle towards you to turn the water on.
- Adjust for hot or cold water by turning the handle - left towards H for hot, right towards C for cold.
The vent in the shower expels excess moisture and odours from the vehicle. To open the vent, twist the handle clockwise. The vent is also equipped with a fan - press the black button to activate it.
17. External shower
The vehicle is equipped with an external shower on the rear of the vehicle.
To operate:
- Open the compartment using the external shower key.
- Turn on the water pump from the main switchboard.
- Turn the shower tap anticlockwise to turn the water on.
- Press the shower button down for water to release.
18. Gas bottle
The gas bottle is located at the back of the vehicle, under the bed. There is a cupboard marked with an LP Gas storage label.
Important: Never drive with the gas bottle turned to the open position.
- To open: Rotate the valve fully anticlockwise.
- To close: Turn the valve clockwise until securely tightened.
If you smell gas:
- Extinguish all open flames and smoking materials.
- Do not touch any electrical switches.
- Shut off the gas supply at the gas bottle valve.
- Open doors, windows, hatches, and all other ventilation openings.
- Evacuate the area until the gas odour dissipates.
- Contact Star RV for assistance.
19. Stove top
Warning: Do not use cooking appliances for comfort heating.
When the stove is in use, ensure that the rangehood is turned on. The rangehood has 4 buttons (from right to left):
- Power button.
- Fan low button.
- Fan high button.
- Light on/off button.
Important: The stove will not work unless the rangehood is turned on.
To operate the stove top:
- Locate the gas bottle on the exterior of the van and fully turn the valve on top to the open position.
- Press in, hold down, and turn the burner knob to your desired heat level.
- While continuing to push in the burner knob, press the igniter switch until the gas ignites. Maintain pressure on the burner knob.
- Wait approximately 15 seconds before slowly releasing the burner knob.
Note: If the flame extinguishes, the burner knob may have been released too soon. Repeat steps 2 to 4 and try again.
20. Tap and sink
The vehicle comes equipped with a water filtration system. The handle on the back of the tap dispenses filtered water, while the handle on the front provides water directly from the freshwater tank.
Adjust for hot or cold water by turning the handle - left towards H for hot, right towards C for cold.
21. Heater and air conditioner
The vehicle is equipped with a reverse cycle air conditioner that generates both hot and cold air. The air conditioner only works when plugged into 240-volt power and when the A/C switch is flicked to ON.
To operate the air conditioner:
- Plug the vehicle into 240-volt mains power.
- Turn the A/C switch, located in the cupboard above the television, to ON.
- Turn on the unit by pressing the power button on the remote control.
- Select the mode.
- Adjust the temperature using the + button (higher) or – button (lower).
Remote control display shows: Time; selected room temperature (target value) in °C; actual room temperature; air conditioning mode; fan speed; symbols for active additional functions; battery status.
Remote control buttons:
| Button | Description |
|---|---|
| Power | Switches the AC on/off. |
| + | Increase temperature. |
| – | Decrease temperature. |
| Fan | Select fan speed. |
| Mode | Select AC mode. |
| Moon | Activates sleep function. |
| Set | Confirms and saves settings. |
| Timer | Sets timer. |
| Campervan | Press once to display interior temperature; press twice to display set temperature. |
| Battery | Remote control batteries are flat. |
Air conditioning modes:
| Mode | Description |
|---|---|
| Automatic (A) | Maintains set temperature automatically (heating/cooling + fan). |
| Cooling (❆) | Cools interior to set temperature. |
| Heating (☼) | Heats interior to set temperature. |
| Ventilation (↓↓↓) | Circulates air without heating or cooling. |
| Dehumidifying | Removes moisture and lowers humidity. |
| Air Purifier | Filters air and removes dust and particles. |
In humid and hot conditions:
- Keep curtains and blinds closed if leaving the vehicle unattended for an extended period.
- Before activating the air conditioner, ventilate the interior by opening doors and windows to expel warm air.
- Once the internal temperature has decreased, close all windows and external doors before switching on the air conditioner.
- Adjust the temperature to 23°C with the fan at maximum speed. Do not set the temperature below this level.
- Following these guidelines reduces the risk of condensation and water overflow.
Note: During periods of high temperature, air conditioners may experience power fluctuations due to voltage drops, which can blow internal fuses.
In cold conditions:
- The air conditioning unit may cease functioning when temperatures drop below 4°C. Wait for the temperature to rise before attempting to use it again.
- The unit may temporarily pause if ice forms on the coils — this is normal. It will resume once defrosted.
- Allow a short warm-up period after restarting for the system to reach full operation.
- If your unit has a heating mode, it may still function even if cooling is disabled below 4°C.
- Ensure the power supply is stable, as voltage drops in cold conditions can also affect performance.
Important: Always turn off the air conditioner using the remote before disconnecting the vehicle from 240-volt mains power.
22. Fridge
The fridge operates via the 12-volt and 240-volt systems.
Starting up: When you turn it on, the fridge will beep once. The screen will light up for 2 seconds, then switch to normal mode.
Turning on/off: Press the power button to switch the fridge on or off.
Night mode: While the fridge is running, hold the button for 3 seconds to activate night mode. The display will turn off and a small night light will come on. Press the button quickly again to return to normal mode.
Setting the temperature:
- Press the set button to choose between freezer or fridge.
- If the left side of the screen is flashing, use + / – to set the freezer temperature.
- If the right side is flashing, use + / – to set the fridge temperature.
- After 4 seconds, the settings will save automatically.
Note: The screen shows the current temperature, so it may take a little while for the fridge/freezer to reach the new setting.
Troubleshooting:
| Problem | Possible cause / Solution |
|---|---|
| Fridge does not work. | Check if the switch is on. Check if a fuse has blown. Check if the power supply has malfunctioned. Note: switching the fridge on and off frequently may cause a compressor start delay. |
| Refrigerator compartments are too warm. | The door has been opened frequently. A large amount of warm or hot food was stored recently. The refrigerator has been disconnected for a long time. |
| Food is frozen. | The temperature was set too low. |
| Code F1 displayed. | Low voltage to the fridge. |
| Code F2 displayed. | Condenser fan is overloaded. |
| Code F3 displayed. | The compressor starts too frequently. |
| Code F4 displayed. | Compressor not kicking in. |
| Code F5 displayed. | Overheating of the compressor and electronics. |
| Code F6 displayed. | No parameter can be detected by the controller. |
| Code F7 or F8 displayed. | Temperature sensor is faulty. |
23. Lights
To operate the cabin lights, turn on the 12-volt control panel by pressing the PWR button.
There are 3 sets of light switches - one behind the kitchen bench (Diagram 1), one in the dining area (Diagram 2), and one in the bed area (Diagram 3). Clicking the OFF button on the interior light switch will turn all lights off.
There are 3 lamp lights equipped with a USB-C port — one in the dining area and two in the bed area.
To switch the lamp lights on:
- Press the round button lightly - 1 press = blue light.
- Press again - 2 presses = white light.
The exterior light is operated by pressing the buttons on the light switch located behind the kitchen bench.
24. Television
The vehicle is equipped with a smart television. The remotes can be found in the kitchen drawer or in the cabinet above the television. The television can run on both 12-volt and 240-volt mains power.
- To use on 12-volt power: Ensure the television 12-volt cord is plugged in.
- To use on 240-volt power: Ensure the television 240-volt cord is plugged in.
Both cords are located in the cupboard above the television.
12-volt set up 240-volt set up Aerial set up
For free-to-air television, ensure the aerial (white cord) is plugged in. Television reception may be limited in some rural areas.
There are two remotes provided - one for the television itself and one for Google Home functions. To operate the television, press the power button on the television remote.
To access Google Home features, you will need an active Google account and a Wi-Fi connection. Once connected, you can enjoy apps such as Netflix, Disney Plus, YouTube, and more.
25. Dining table
To remove or adjust the dining table, click the buttons on the edge below the table towards you (backwards). To secure the table in place, push the buttons away from you (forwards).
26. External table
The external table can be set up outside while the vehicle is stationary.
To set up the table:
- Find the outdoor table bar located behind the sliding door.
- Attach table clips to the table bar.
- Push the buttons away from you to secure the table in place.
- Ensure that the legs of the table are always on a flat surface.
You can extend the table legs by twisting the end of the leg.
27. Swivel chairs
The passenger and driver seats are designed to swivel for your convenience when transitioning to the dining table area. To swivel the chair, pull the lever on the side of the chair towards you and spin the chair around.
28. Power points
The vehicle is equipped with two power points in the kitchen, two power points in the cupboard above the TV, and two power points under the dining table. These will only work when the vehicle is plugged into 240-volt mains power.
The vehicle also includes multiple charging options:
- Under the dining table (Diagram 1): one USB-C port and one USB port.
- On each interior lamp (Diagram 2): three USB-C ports.
- Inside the cupboard above the television (Diagram 3): one USB port. To use this port, press the button next to it - a red light will appear when it is switched on and ready to use.
All USB and USB-C ports operate when the vehicle is plugged into mains power and the 12-volt control panel is turned on.
Diagram 1. Diagram 2. Diagram 3.
29. Bed
The vehicle is fitted with a comfortable double bed. Standard bedding is provided for your convenience.
30. Entrance step
The vehicle is equipped with an entrance step located on the passenger side sliding door. The button to extend and retract the step is located behind the kitchen bench.
- To extend the step: Push the up arrow on the button.
- To retract the step: Push the down arrow on the button.
Note: When the vehicle is turned on and shifted into drive, the step will retract automatically.
Step retracted Step extended
31. Storage
The vehicle has a dedicated storage area under the bed, as well as various drawers and cupboards throughout the vehicle.
32. Internal blinds
To secure the internal thermal blind to the front windscreen, rear windscreen, and two side windows:
- Retrieve the internal thermal blind from the storage compartment located above the front cabin of the vehicle.
- Unfold the thermal blind and position it against the front windscreen, ensuring it covers the entire surface area.
- Attach the suction cups to the designated points along the edges of the blind.
- Press firmly on each suction cup to ensure a secure attachment to the windscreen. Make sure there are no air gaps between the suction cup and the glass surface.
- Repeat the same process for the two side windows and rear window using the remaining suction cups.
- Once all suction cups are securely attached, adjust the position of the blind as needed to ensure proper coverage and fit.
- When not in use, carefully remove the suction cups from the glass surfaces and fold the blind for storage in the designated compartment.
33. Awning
To roll out the awning:
- Using the awning handle, roll out the awning.
- Unfold both awning arms by twisting them down.
- Twist the button anticlockwise and pull down to secure the awning legs.
- Secure the awning by attaching to the foot clips located on the side of the motorhome to hold the awning legs in place.
Note: The awning winder is located at the rear of the vehicle, attached to the bed frame.
34. Diesel fuel
The vehicle accepts diesel fuel only. Do not refill with any other fuel or fluid.
- The diesel tank cap is marked with "DIESEL" and is unlocked using the vehicle diesel key.
- The fuel filling location is next to the passenger door.
- Open the lid using your hands, then use the diesel key to unlock. Turn the key anticlockwise to unlock the cap.
- Once filled, place the fuel cap on the inlet and turn the key clockwise to lock.
Important: If you accidentally fill the vehicle with unleaded fuel, water, or AdBlue - do not start the engine. Call STAR RV Roadside Assistance immediately.
35. AdBlue
Every 2,500 km the vehicle will require AdBlue to be refilled. If the AdBlue level is low, a warning light or symbol will illuminate on the dashboard with a message to top up. The AdBlue filler cap is below the diesel filler cap.
Find the nearest fuel station or auto shop supplying AdBlue and refill as soon as possible. Failure to refill the AdBlue tank will result in the vehicle going into limp mode.
Important: AdBlue is NOT a diesel fuel additive. Do not add or mix AdBlue with diesel under any circumstances.
36. Changing a tyre
Prepare the vehicle:
- Stop the vehicle in a safe, flat, and stable area.
- Turn off the engine and engage the parking brake.
Retrieve the tools (tool bag under the passenger seat):
- Rod for spanner.
- Bolt spanner.
- Jack.
- The extension for the spanner is located on the back wall behind the passenger seat.
Change the tyre:
- Loosen the wheel bolts by one turn using the bolt spanner, extension, and rod.
- Extend the jack slightly and position it at the designated lifting point.
- Raise the vehicle with the jack until the wheel is off the ground.
- Remove the spare wheel from under the vehicle and free it from its holder.
- Place the spare wheel, lining up the holes with the pins.
- Tighten the bolts using the bolt spanner, extension, and rod — cross from one bolt to the opposite one.
- Lower the vehicle and remove the jack.
Don't forget to:
- Tighten the wheel bolts fully.
- Put the punctured wheel back in its holder and tighten the knob.
- Store the tools back in their bag and place under the passenger seat.
37. Safety and operational features
Seat adjustment
- Longitudinal adjustment: Lift lever (A) to slide the seat forward or backward. Arms should rest comfortably on the steering wheel when seated.
- Height - raise: Lift lever (B) (front of seat) or lever (C) (rear of seat) upwards and slightly lift your body.
- Height - lower: Press lever (B) or (C) upwards and shift your weight to lower the seat.
- Backrest angle: Use knob (D) to adjust the backrest angle.
- Lumbar support: Turn knob (E) to customise lumbar support.
Fig. 1 Fig. 2
Exterior mirror adjustment
To optimise the view, adjust the outside mirrors to focus on the adjacent lane with slight overlap from the interior mirror's view.
Manual adjustment: Move the mirror glass to the desired position.
Power mirrors: Ensure the ignition key is in the MAR position. Use knob (B) to select and adjust:
- 1: Left mirror.
- 2: Right mirror.
- 3: Left wide angle.
- 4: Right wide angle (available for specific mirrors).
Move knob (B) in the direction of the arrows to adjust the selected mirror.
Fig. 3
External lights
The auto function for headlights automatically adjusts the vehicle's lights based on surrounding light conditions. It activates headlights at dusk, in tunnels, or in low visibility. To turn on: Rotate the ring of the left stalk to the AUTO position A.
Fig. 4
Windscreen wipers and washer
The right stalk controls the windscreen wiper and washer. It only works when the ignition is in the MAR position. Ring (A) settings:
- Wipers off.
- Wipes at a slow, steady pace.
- Adjusts wiping speed based on vehicle speed.
- Constant slow wipe.
- Constant fast wipe.
Smart washing function: Pull the stalk towards the steering wheel to spray washer fluid and activate the wipers.
Fig. 5
Air conditioning system (cabin)
Controls:
- A: Temperature adjust button.
- B: Display screen.
- C: Fan speed adjust button.
- D: Power off button.
- E: Air recirculation button.
- F: AC compressor on/off button.
- G: Airflow direction button.
- H: Max cooling on/off button.
- I: Windscreen defrost button.
- L: Auto mode on/off button.
Fig. 6
To use: Press AUTO (L) and set the desired temperature using button (A). The system will automatically adjust air temperature, airflow, distribution, and recirculation.
Temperature adjustment: Press (A) down to decrease, up to increase. Repeatedly pressing (A) switches between HI and LO. Select a specific temperature to exit these modes.
Air distribution: Press button (G) to select: dashboard vents, footwell vents, windscreen, or max defrost. Modes can be combined. In AUTO mode, distribution is adjusted automatically.
Fan speed: Press (C) down to decrease, up to increase. Press AUTO to restore automatic fan control.
Air recirculation: Press (E) to toggle. Helps reach desired temperature faster. Avoid recirculation in cold or rainy conditions to prevent window fogging. In AUTO mode, recirculation is managed automatically.
Display screen
- A: Tachometer.
- B: Speedometer and multifunction display.
- C: Fuel level gauge.
Fig. 7
Steering wheel control buttons:
Up/down arrow: Scroll through the Main Menu and submenus.
Left/ Right arrow: Access information screens or submenus.
- OK: Select items or access submenus.
Fig. 8
Electronic cruise control
Cruise control maintains a set vehicle speed without pressing the accelerator. Buttons are located on the right side of the steering wheel.
Activate: Press button (A). The symbol will appear on the instrument panel.
Set the desired speed:
- Activate the system.
- Once the vehicle reaches the desired speed, press and release SET + or SET –. The vehicle will automatically maintain that speed once the accelerator is released.
- You can temporarily accelerate by pressing the accelerator. When released, the vehicle returns to the stored speed.
Warning: Ensure the vehicle is at a constant speed on a flat surface before pressing SET + or SET –.
Adjust speed:
- Increase: Press and hold SET +. Release to store the new speed.
- Decrease: Press and hold SET –. Release to store the new speed.
Deactivate: Press the CANC button or press the brake pedal. The system will also deactivate if the electric parking brake (EPB) is engaged or if the braking system is triggered.
Fig. 9
Media
Pairing a Bluetooth device:
- Turn on Bluetooth on your device.
- Go to "Device Manager" under the "Phone" tab.
- Tap "Add Device."
- A temporary PIN will appear on screen. Enter this PIN on your device.
USB source:
- One USB port on the dashboard for charging only.
- One USB port lower on the dashboard for charging and data transfer.
When a USB device is plugged in, it will start playing automatically if AutoPlay is enabled. If off, only charging will occur when a smartphone is connected.
Phone mode: Tap the "Phone" button to activate. Use the display to dial numbers, view contacts and recent calls, and view text messages.
Apple CarPlay and Android Auto: Connect a compatible smartphone to the vehicle USB port. The phone's contents will automatically appear on the Uconnect™ system display.
38. Dash warning lights
| Symbol | Warning light | Description | What to do |
|---|---|---|---|
| Brake warning (Red) | Handbrake engaged or low brake fluid. If shown with ABS light, brake fault. | Pull over safely and avoid sudden braking. If shown with the ABS light, stop immediately and contact Roadside Assistance. | |
| ABS warning (Amber) | ABS fault - brakes still work without ABS. If shown with brake light, possible brake failure. | If on alone, drive cautiously and check as soon as possible. If shown with brake light, stop immediately and call Roadside Assistance. | |
| Electronic Stability Control (Amber) | Traction control fault. Flashing = active; constant = fault. | Drive with caution. Restart the engine; if it stays on, contact Roadside Assistance. | |
| EBD Failure Warning (Amber / Red) | EBD system is unavailable or has malfunctioned. | Brakes may be unstable. Drive slowly and carefully. Contact Roadside Assistance. | |
| Power steering (Amber / Red) | Overheated or failed steering assist. | If red, take extra care steering. Pull over and contact Roadside Assistance. | |
| Airbag / SRS (Red) | Fault in airbag or seatbelt system. | Contact Roadside Assistance. | |
| Coolant overheat (Red) | Engine overheating - possible low coolant or leak. | Stop immediately and contact Roadside Assistance. | |
| Battery charge (Amber / Red) | Battery not charging. | Contact Roadside Assistance. | |
| Oil pressure (Red) | Low oil pressure or high oil temperature. | Stop immediately and contact Roadside Assistance. | |
| Engine management (Amber) | Fault with engine or emissions. | Continue to your destination, then contact Roadside Assistance. | |
| AdBlue warning (Amber) | Low AdBlue fluid. | Safe to drive approximately 600 km. Refill at least 5 litres as soon as possible or the vehicle may go into limp mode and not restart. | |
| Immobilizer (Amber) | Anti-theft fault or key battery issue. | Continue driving and contact Roadside Assistance. | |
| Lane departure alert (Amber) | System off or fault. | Check whether it's turned off; if faulty, contact Roadside Assistance. | |
| Tyre pressure (Amber) | Low tyre pressure or puncture. | Inflate to spec; if flat, stop and call Roadside Assistance. | |
| Glow plugs (Amber) | Fault with glow plugs or relay. | Safe to drive short term - contact Roadside Assistance. | |
| Diesel particulate filter (Amber) | DPF regenerating or blocked. | Continue driving for 15 minutes at 60 km/h with engine revs above 2,000 rpm. If it persists, try again or call Roadside Assistance. | |
| Collision avoidance (Amber / Red) | Amber = system has activated. Red = system fault. | If amber, no action required. If red, check sensors for obstruction - system is disabled until fixed. | |
| Brake pad warning (Amber) | System has detected brake pad wear at 20%. | Safe to drive short term. If you have more than 5,000 km left on your trip, contact Roadside Assistance. | |
| Maintenance warning (Yellow) | Vehicle is due or close to scheduled service. | Safe to drive. Please let the Customer Service Team know at your drop-off location. | |
| Warning triangle (Amber) | No specific warning light available. May indicate: fuel cut-off, lighting failures, airbag sensor, rain sensor, diesel filter, engine oil level/pressure, parking sensors, or water in fuel. | Continue driving but pay attention to any unusual sounds or behaviour. On arrival, contact Roadside Assistance and report what you noticed. |